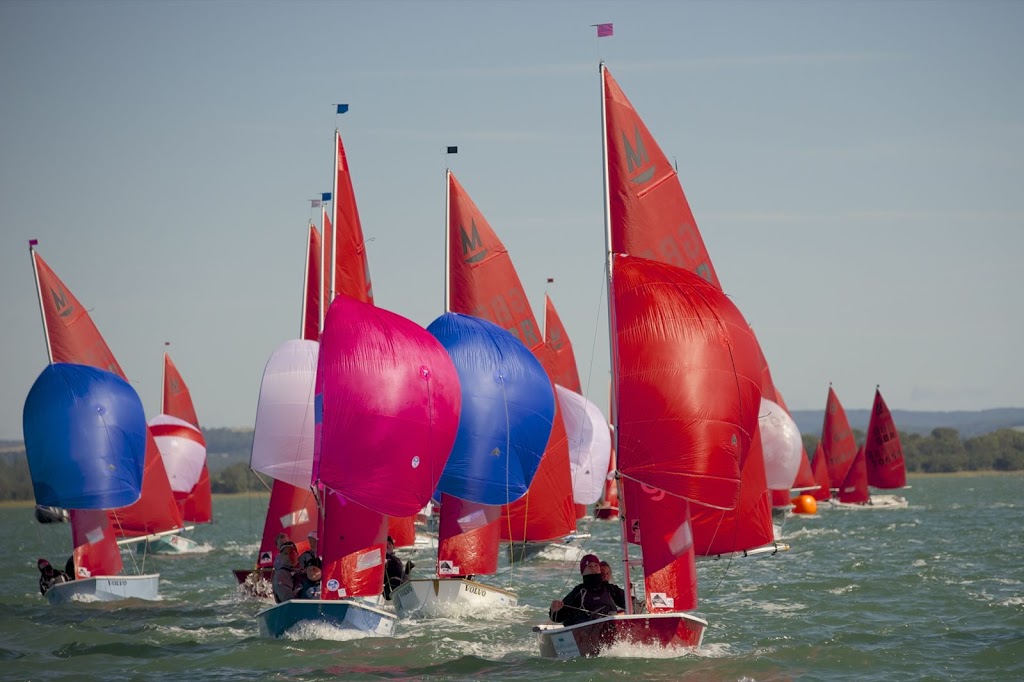
This picture demonstrates exactly how tight against the mast it's possible to get the gaff. It's clearly a windy day and, no doubt, they had been out racing for a while, but still no sign of a gap between the mast and the gaff. I think the whole boat set up looks near-perfect.
In order to get your gaff tight up against the mast, a number of elements need to come together to ensure success.
- Main Halyard
- Gaff band or slot & pin
- Attaching the halyard to the gaff
- Mast sheave cutout
- Halyard cleat or hook up racks
- 2:1 purchase on halyard
- Good rigging practice
Main Halyard

In my view, there are only two choices
- Dyneema/Spectra/Kevlar/Vectran - any of these modern, low-stretch, high performance ropes should work as a main halyard. I currently use 4mm Vectran with a polyester cover (made by Marlow Ropes). Those who can splice and taper modern high performance ropes should be able to do better (e.g. less windage, less weight,...). These videos 'More grip, less friction' from Marlow Ropes (2020) give an insight into what is possible for those with the skills (or deep pockets).
- Wire - the photo above shows that 60100 - Super Sidewinder used wire for the jib halyard. It is inconceivable that she did not use wire for the main halyard as well (back in the 70s and 80s, rope was more stretchy). Using wire halyards has long been permitted, and a few top sailors have used them. However they bring their own problems, requiring a metal sheave in the mast rather than the normal plastic one and a hook up rack rather than a cleat (though some cleat the halyard tail). If the splice between the wire and the rope tail would not go through the mast head sheave, you can't lower the gaff fully. Also the sheave has to be a snug fit in the slot, otherwise the thin (e.g. 2mm diameter) wire will jamb down between the sheave and the mast. I've never tried wire, the disadvantages have always put me off, but, if you can overcome the problems, I'm sure it works very well.
Gaff band or slot & pin
See the article 'Fitting out a gaff'
Attaching the halyard to the gaff
If you use a gaff band there are a couple of options, and tying a big chunky knot, or using a shackle is not one of them.
- Tie a compact knot. Guy Wilkins recommends this method in his book 'Mirror Racing'.
- Splice the halyard directly onto band. I use a variation of this method (see below).
- Run the halyard through band attachment point from below and tie a figure of eight. This is the suggested method in 'The Mirror Book'. I've got my doubts about the wisdom of relying on a figure of eiqht knot not pulling past the band attachment point, bearing in mind the tension that will be applied to the halyard. There has to be a risk the knot will just pull through.
- Run the halyard through the band attachment point from below and tie it off on a deck clip fitted to the front of the gaff a little way above the band.
All these methods should allow the halyard and gaff band to be pulled close into the mast head sheave slot. If they don't, you need to use one of the other methods. Bear in mind that the main halyard is going to be under considerable tension, so the band is likely to wear, and start to cut into, the halyard where it touches. You will need to check the halyard for wear regularly. Some people used to 'dress' the band attachment point by winding 'soft' wire (e.g. John McNulty used monil (? maybe he meant monel?) wire) around it to reduce wear on the halyard.

One way to avoid any halyard wear issues is to use a stainless steel eye inside the splice. This is my preferred method and I use an 'egg' shaped eye which is, I think, a Seasure 06.86 - 4mm solid stainless steel thimble. I think the Ronstan RF2181 would work as well. If you can splice dyneema etc., you will be able to do a neater job than my sewn splice, which uses Marlow whipping twine and the stictching goes from the eye and along about 50mm of halyard overlap a couple of times. To sew like this you will need a large sailmaker's needle and a sailmaker's palm.
")
To get the hard eye to move freely on the band, I cut the top and bottom corners off the band attachment using a small hacksaw. Don't cut too much off or you will weaken the band too much.
Mast sheave cutout
See my comments regarding the mast sheave cutout at the bottom of the 'Fitting out a gunter mast' article.
Halyard cleat or hook up racks
See my comments regarding halyard cleats in the 'Fitting out a gunter mast' article. There is a good arguement that, by going for a spliced eye in the end of the main halyard, plus a tail (as one would with a wire halyard), one could then use a hook up rack and avoid any possibility of the halyard slipping in the cleat. If I was fitting hook up racks, I would put them in the same place - on the aft face of the mast, about half way between the heel point on the mast and the gooseneck.
2:1 purchase on halyard
The class rules allow a 2:1 purchase on the main halyard, and if you are serious about getting the gaff up tight, this is an essential element. Various methods have been tried over the years, most common was to tie a loop in the main halyard which was a little way above the cleat when the gaff was fully hoisted. The end of the halyard was taken around the bar on the clamcleat (typically a closed one), then threaded through the loop and back down through the clamcleat to jamb. This works, but there are a few snags
- The loop typically won't go through the masthead sheave, so you can't fully lower the gaff, unless you untie the halyard which is a pain. Some sailors used to have to leave the gaff hoisted when they packed away the boat overnight. Richard Telford (Jonny Telford's dad) invented a variation, using a 'granny' (I think they mean overhand) knot on a bight to form the loop, which untied easily, overcoming this problem.
- There is a lot of friction where the halyard is going through the loop and around the bar on the clamcleat.


2:1 main halyard purchase on 15563 'Blyskawica' aka 'Basket Case' - Click to expand
I use a method which avoids these problems. I have a short (about 1m long) piece of low-stretch, high performance rope which is tied to a deck clip which is fixed to the back of the mast between the main and jib halyard cleats, see the 'Fitting out a gunter mast' article. This line, which I call the "tightener", goes around the sheave of a small (ball bearing is best) block, so the block moves freely. There is a figure of eight at the end of the tightener to stop the block coming off when not in use. An 'open' clamcleat (e.g. a CL217MK2AN or CL218MK2AN - mark 2 side entry) is shackled by the lower fixing hole to the head of the block (photo 1 above).
You pull the gaff more or less right up. If you are have an 'open' clamcleat for the main halyard, you can put the main halyard in the cleat temporarly to free up both hands for the next stage. You then engage the cleat on the tightener, onto the main halyard, somewhere between the goosneck and the main halyard cleat. The exact position does not matter too much. You need to make sure the cleat on the tightener is firmly 'cleating' the main halyard, it must not be able to slip, check it by gripping the tightener cleat and pulling it down hard (photo 2 above).
Now take up the slack on the free end of the tightener, so that the main halyard below the tightener cleat is slack. Slip the main halyard out of the main halyard cleat (if it is in there) and put the tightener in. Pulling the tightener now tightens the main halyard with a 2:1 purchase (photo 3 above).
Lowering the gaff is the reverse, slack off the tightener, remove the tightener cleat from the main halyard and lower normally.
Apart from overcoming all the disadvanages of having a loop in the halyard, this system also means that the point on the main halyard where the tightener attaches can vary over about 150mm, so wear from the tightener cleat is distributed and the halyard will last longer than if it was always been cleated in the same place. I've used this system for over 20 years and it works well.
Good rigging practice
Needless to say, when pulling up the main halyard:
- Make sure the boat is head to wind
- Make sure the mainsail tack downhaul is totally slack.
- Make sure the mainsail lacing is not stopping the mainsail from going up.
- Make sure the kicking strap is totally slack
- Make sure the mainsheet is totally slack
- Maybe ask somebody to hold up the end of the boom so you are not pulling up against the weight of the boom
This should mean you are only hoisting the weight of the mainsail and the gaff. Check the gaff has gone all the way up, then apply your 2:1 purchase system. If you don't have a 2:1 purchase you can 'sweat' the halyard by pulling the tight section sideways, and then take up the slack through the cleat. Then 'stand' on the halyard (hold the halyard in one hand so there is a loop of halyard or 2:1 tightener tail coming down from the cleat and back up to your hand. Put your foot in this loop (like a stirrup) and transfer your weight to this foot. This will apply a force, up to your body weight, to the halyard. The gaff should now be hard against the back of the mast. Maybe wait a few minutes to allow the halyard to 'settle' and retighten the 2:1 purchase just to be sure.
In a light wind, you may find a bar tight halyard is stopping the gaff rotating. In this case you can slack off the 2:1 slightly so the gaff rotates as required.
Needless to say, when lowering the mainsail, always tension the tightener, or the main halyard, so you, rather than the cleat, is holding the tension, and then ease it out of the clamcleat. Just ripping it out of the cleat, when the cleat is taking all the load, will damage the halyard, or tightener, which means you will have to replace it more often.
Maintenance
If you find either the halyard, or the tightener is slipping through it's cleat, you need to replace either the cleat, or the halyard/tightener, or both. You could try reversing the halyard (which will require a new splice if you use that method), or, if your halyard is long enough, you could cut a couple of feet off the end which attaches to the gaff (again, you will need to a new splice if you use that method), so the section of the halyard engaging in the cleat when it's fully hoisted changes.